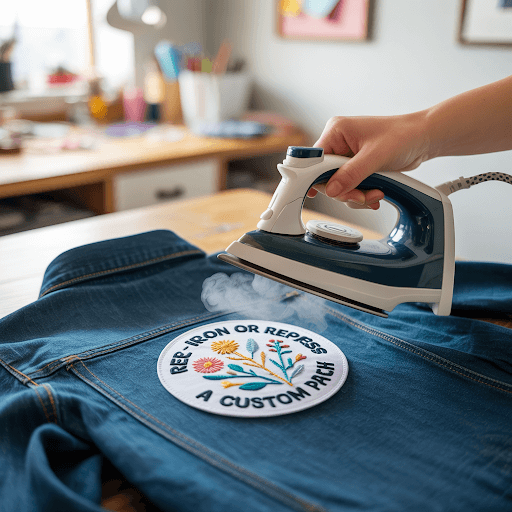
There’s nothing more disappointing than spotting the corners of your once-flawless custom patch start to lift. You chose the perfect design, maybe a moustache-shaped logo for your barbershop uniform or a snowflake icon on your holiday hoodie and now it’s starting to peel like it’s waving goodbye. But hold up, your patch isn’t doomed. You can absolutely re-iron or re-press a custom patch and bring it right back to life.
Whether you’re rocking custom logo patches for jackets, promoting your small business, or just trying to make that cat-shaped patch look less like it’s doing a backflip, revitalising your patch is simpler than you think. Let’s look into why patches lift and how you can rescue them with style.
Why Do Custom Patches Start to Lift?
Custom patches are built to last, but life happens. Here’s what might be causing the rebellion:
1. Hot Washes & Dryers: Patch Kryptonite
High heat and strong spin cycles can break down the adhesive on even high quality embroidered patches made in the USA. That heated tumble in the dryer? Not patch-friendly.
2. Fabric Trouble: Stretch = Stress
Stretchy or textured fabrics may cause lifting due to constant movement. Think gymwear, yoga hoodies, or even certain types of fashion-forward denim.
3. Time & Repetition: The Adhesive Wears Out
Even the best adhesive won’t last forever. If your patch has seen more action than your favorite playlist, it might be due for a quick re-press.
How to Re-Iron Your Custom Patch the Right Way
Let’s get practical because your patch deserves a second chance.
Step 1: Prep the Surface
Clean off any lint, dirt, or fabric softener residue. A clean surface helps the adhesive grip again, especially important for custom embroidered patches for hoodies and thicker fabrics.
Step 2: Set Your Iron
Choose a medium-high, dry heat setting. No steam. Moisture weakens the bonding process.
Step 3: Line It Up
Place the patch exactly where it lifted. If you’re re-pressing a custom logo patch for bags or jackets, you’ll want a heat-resistant surface underneath to avoid damage.
Step 4: Use a Barrier
Always protect the patch with a thin cloth, parchment paper, or pressing sheet. Direct heat may scorch it, especially custom PVC patches or custom sequin patches.
Step 5: Press with Purpose
Hold the iron down firmly for 25–30 seconds. Move in slow circles for even pressure. Allow the patch to cool fully before checking.
Looking for a quicker fix with stronger hold? At Patch Makers USA, we offer fast turnaround custom patches USA made with premium adhesives that are easier to re-apply when needed.
Explore our wide range including custom applique patches, custom chenille patches, and even custom patches for small businesses that won’t quit on you after a few washes.
Heat Press or Hand Iron: Which One’s Better?
If you’re in the “I want this done right, right now” camp, a heat press machine is your best friend. It provides even pressure and temperature, especially for bulk reapplication of custom scout patches bulk or bulk custom patches for uniforms.
If you’re a DIYer with an iron, don’t worry, follow the steps above and you’ll still get a long-lasting stick, especially on custom patches for bomber jackets, hats, or workwear.
For a more detailed breakdown of iron-on application tips, you’ll want to check out our full guide: How to Iron On Patches. It walks you through each tool and tip with visuals to ensure your reapplication is patch-perfect.
Bonus Tips for a Better Re-Press
Add Fabric Glue: For patches that just won’t stay down (looking at you, custom patches for festivals), a small dab of fabric glue can work wonders. Be sure to choose one that’s washable and heat-resistant.
Consider Stitching Edges: Want to really make sure your patch sticks? Stitch around the perimeter after ironing. It gives your custom biker patch for jackets or custom military patches USA a secure finish.
Repress When It’s Warm, Not Hot: Always let the patch cool before checking adhesion. Heat needs time to set into the fabric fibers.
When Should You Skip the Iron and Go for the Needle?
Sometimes, re-ironing doesn’t cut it, especially for high-wear items like custom patches for hoodies or custom logo patches for jackets. If you find yourself frequently re-pressing the same patch, it may be time to pull out the thread and needle.
Here’s when you should stitch instead:
- Frequent Washing: Items like work uniforms or kids’ jackets (hello, custom team patches for sports uniforms) go through intense laundering.
- Heavy Use: Backpacks, bomber jackets, or denim vests see a lot of movement, which means added friction.
- Event Patches: If you’ve added custom patches for events or promotional patches for brand marketing, sewing ensures they last long after the event’s over.
Sewing around the edges helps anchor the adhesive while giving the patch a permanent place on your gear. Especially for shaped patches like moustaches, beards, or stars, those narrow corners benefit from reinforced edges.
Need help picking the right type for your gear? Browse through our extensive Custom PVC Patches collection, ideal for rugged use and resistant to water, peeling, and even stretch!
Patch Shapes that Deserve a Second Press
Here’s where it gets creative. Custom patches today aren’t just round or square, they’re designed like objects. That flower-shaped patch on your summer bag? Or the snowflake on your kid’s holiday sweater? Those fine details tend to lift first due to the shape.
Let’s explore some popular object-inspired patch shapes and how to re-press them smartly:
Flowers: Petals can curl easily. Use a pencil eraser to press down tiny corners as you re-iron for full adhesion.
Beards & Moustaches: These fun novelty patches work great on barbershop aprons or hats but may lift from the tips. Focus heat directly on those ends using a pressing cloth.
Snowflakes: Gorgeous but delicate. Use extra parchment paper to keep pointy edges from crisping.
Stars & Abstracts: Multi-point designs look amazing on custom clothing patches, but the narrow edges lift first. A small pressing iron or mini heat press tool can help here.
Reinforcement Tips for Shaped Custom Patches
Use Fusible Webbing: Cut a small strip of fusible webbing for tricky corners and edges.
Add a Thin Stitch Border: For oddly shaped designs like leaves, badges, or even food-themed patches (yes, pizza slices exist), a minimal hand stitch helps lock down the shape.
Try Replacing, Not Repairing: If your patch is too worn, it may be time for a fresh one. Fortunately, you can buy custom patches online with just a few clicks and get a perfect replacement, fast.
Start fresh with a premium batch from Patch Maker like PMU. We offer cheap custom patches with no minimum, so even if you need just one new patch shaped like a turkey for Thanksgiving or a bunny for Easter, we’ve got you.
Want to avoid patch peeling next time? Then you must read our helpful prevention guide. How To Prevent Iron-On Patches From Falling Off. It covers fabric compatibility, washing tips, and everything else to make sure your patch stays where it belongs.
Still Not Sticking? Time to Replace Smartly
If re-ironing and reinforcing don’t do the trick, it’s time to replace your patch. But that doesn’t mean starting from scratch. Patch Makers USA makes it simple to design your own patch and order in a few clicks, whatever shape, color, or use-case you have in mind.
From custom employee name patches for workwear to custom patches for thanksgiving and custom scout patches bulk, we handle every shape and purpose even custom-shaped logos for your brand.
Looking for the best patch maker in the USA with quick delivery? Try our Custom Leather Patches, premium finish, excellent durability, and eye-catching even after years of wear.
Don’t Ditch Your Patch, Fix It or Flip It!
Custom patches are personal, whether they’re for a holiday, a memory, or your business branding. If one starts to lift, don’t stress re-ironing or re-pressing can bring it back to life with a little effort and the right tools. And if not, consider upgrading to a fresh batch that lasts longer and looks even better.
From custom patches for Christmas sweaters to custom logo patches for hats, our team as Patch Maker is here to help with rush orders, bulk deals, and unique shapes that tell your story.
All set to re-press, replace, or restyle your patch? Contact Patch Makers USA Today, the USA#1 Custom Patch Maker with free shipping, fast turnaround, and truly creative results.