Stitch Too Tight? It Might Be the Density Talking! Have you ever noticed or wondered why one custom hoodie embroidery looks crisp and clean, while another puckers up and falls flat? Or why do some embroidery patches custom-made for hats feel soft and flexible, while others turn your cap into a stiff board? The secret often lies in one technical but game-changing factor—stitch density.
Whether you’re deep into designing custom embroidery patches or just browsing custom embroidery near me, understanding stitch density is your golden ticket to mastering the art of machine embroidery. This unsung hero of embroidery digitizing doesn’t just determine how a design looks—it affects the fabric’s durability, feel, and how long that killer logo holds up after wash day.
Let’s break it down in the simplest terms, so the next time you’re customizing a Nike hoodie, Carhartt jacket, or Patagonia custom embroidery, you know exactly what you’re working with.
Understanding Stitch Density in Machine Embroidery
Stitch density refers to the number of stitches placed within a specific area of your embroidery design. It’s basically how tightly packed the threads are. When you’re getting custom embroidery shirts or designing for custom embroidery hats, the density determines whether your design will feel like soft fabric art or stiff armor plating.
How Is Embroidery Density Measured?
Embroidery density is usually measured in millimeters (mm), indicating the space between each stitch. The most common unit is 0.4 mm to 0.5 mm for standard fills. But here’s the catch: a lower number means a higher density (i.e., more stitches per inch), and a higher number equals a lighter, more breathable stitch.
So if you’re using an embroidery density chart while working with a custom embroidery machine, here’s a quick cheat:
- 0.2–0.3 mm = Very high density (great for fine details on custom embroidery logos)
- 0.4 mm = Medium/Standard (go-to for general embroidery custom shirts or hats)
- 0.5 mm and above = Low density (ideal for lightweight fabric or large fills)
Why Stitch Density Matters in Custom Embroidery
If you’re into custom embroidery services, especially on custom sweatshirt embroidery or hat custom embroidery, then stitch density is your make-or-break detail.
1. Impacts Fabric Stability
Going too dense on a thin hoodie? Expect wrinkles, puckering, and maybe even tearing. Custom crewneck embroidery or sweater embroidery on delicate fabric needs careful density control. The same goes for custom embroidery jackets—get it wrong, and the fabric could stiffen or distort entirely.
2. Affects Design Clarity
You might want your custom embroidery digitizing to have solid fill, but that doesn’t mean piling in stitches like there’s no tomorrow. Overcrowding can blur the design, making custom embroidery designs look muddy. Especially on smaller elements like lettering for custom patch embroidery or personalized patches, clarity is everything.
3. Influences Thread Consumption & Stitch Time
Higher stitch density means more thread. More thread means more time. So if you’re running bulk orders for custom embroidery polos or custom dash covers with embroidery, this could increase costs and turnaround time.
How Fabric Type Affects Stitch Density
Different fabrics demand different density settings—simple as that. You wouldn’t treat a lightweight cotton tee the same way you treat a rugged denim jacket, right?
For Lightweight Fabrics (T-Shirts, Hoodies)
When doing custom embroidery shirts or hoodie embroidery, aim for lower stitch density—0.4 to 0.6 mm. It keeps the fabric breathable, flexible, and prevents puckering.
For Thick or Structured Fabrics (Caps, Jackets)
If you’re working on custom embroidery hats, custom cap embroidery, or custom trucker hat embroidery, you can afford a tighter stitch density. Structured surfaces can handle the extra thread and maintain shape better.
For Stretchy Fabrics
Stretch fabric requires even more caution. Think custom embroidery sweatshirts or custom polos made of performance wear—reduce the density or risk damaging the elasticity.
Related to your interest: What Embroidery Patches Coverage to Choose (50%, 75%, or 100%)
Stitch Density vs. Underlay Stitching
Stitch density isn’t the only factor in machine embroidery—underlay stitches play a huge role too.
What’s an Underlay Stitch?
It’s a foundation layer laid down before the main design. It helps stabilize the fabric and prevents puckering. Your digitizer will select an underlay stitch type based on the fabric and design complexity.
For example, when embroidering custom embroidery baseball caps, underlay stitching helps the thread grip the curved surface.
Common Problems Caused by Incorrect Stitch Density
Even if you’re using the best embroidery machine for custom designs, wrong stitch density can cause:
- Thread breaks from too many stitches in one spot
- Fabric puckering on thin materials
- Stiff patches on what should’ve been soft custom embroidery hoodies
- Gaps in design from too low a density
Bonus Tip:
Use a test swatch before going full-scale—especially for custom embroidery digitizing services in bulk orders. It’s a lifesaver for avoiding disasters.
Stitch Density Best Practices for Machine Embroidery
So, how do you strike the perfect balance? Whether you’re setting up your own custom embroidery online shop or working with a local custom embroidery Houston provider, keep these quick tips in mind:
Test Before You Stitch
Before committing a design to your $80 custom embroidery polo shirt, always do a small test run on similar fabric.
Use an Embroidery Density Chart
If you’re unsure, lean on industry-proven embroidery density charts tailored to different fabrics and designs.
Digitize with Density in Mind
When using custom embroidery digitizing services in USA, communicate your fabric type, thread count, and expected use. They’ll know how to set it right.
Best Embroidery Machine For Patches: Know the types, threads and customization tips
How Stitch Density Impacts Different Custom Embroidery Applications
Depending on what you’re customizing—whether it’s custom embroidery hats, custom sweatshirt embroidery, or embroidery patches custom-made—your stitch density needs to adjust accordingly.
Embroidery for Hats and Caps
For curved surfaces like custom hat embroidery, custom trucker hat embroidery, and custom cap embroidery, you need higher density for design integrity. However, too much can lead to a rock-hard result—nobody wants a hat that feels like a helmet.
When customers search custom hat embroidery near me, they want high-quality and comfort. That’s where density precision comes in.
Embroidery for Shirts and Polos
For custom shirt embroidery, custom polo embroidery, or custom embroidery polo shirts, a moderate stitch density of 0.4–0.45 mm typically works well. It’s dense enough for detail but loose enough to keep the fabric soft and wearable.
Bonus: On stretchy polo material, slightly reducing stitch density also prevents the embroidery from distorting after wear or washing.
Embroidery for Hoodies and Sweatshirts
Hoodies are thick, but they’re often made from knit fabric. That means they’re flexible—and easily distorted. When creating custom hoodie embroidery or custom embroidery sweatshirts, go with moderate density and a solid underlay. The combo will stabilize the fabric and give a premium, long-lasting finish.
Got a client asking for custom embroidery no minimum for hoodies? Make sure they know density makes or breaks how wearable the final product will be.
Using Stitch Density for Custom Patch Embroidery
Density in Embroidery Patches Custom Designs
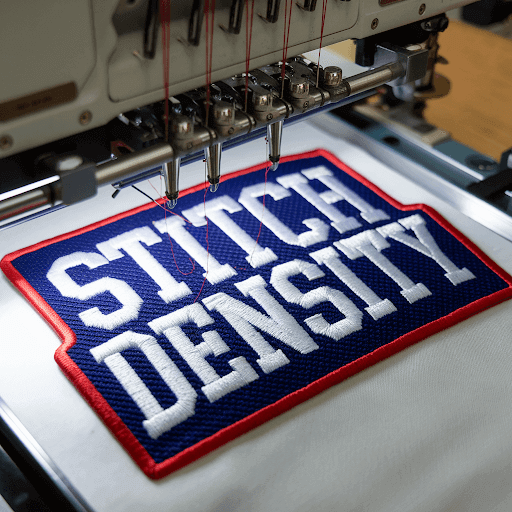
When working on custom embroidery patches for hats, jackets, or bags, your density needs to be on the higher side—around 0.3 mm—especially for small text and logos. This gives patches the rich, crisp texture people love. If you’re into custom patch embroidery or personalized patches, the secret to sharp finishes is tight density with a solid satin border.
Patches are the face of many brands, so your custom embroidery digitizing needs to reflect durability, not just design.
Role of Digitizing in Stitch Density
You can have the best custom embroidery machine, the latest threads, and premium materials, but if your design file is off, none of that matters.
Digitizing translates your artwork into stitches. The density, direction, underlay, and stitch type are all defined here. Good digitizing ensures your embroidery custom shirts and custom embroidery designs come out clean and consistent.
Tip for Businesses:
Whether you’re running custom embroidery services in LA, Houston, or San Diego—custom embroidery digitizing services in USA are worth the investment. Don’t compromise your product quality by skipping pro-level digitizing.
Embroidery Density Chart: Your Secret Weapon
If you’re offering custom embroidery and screen printing, especially for bulk jobs like custom embroidery jackets, having an embroidery density chart on hand can save you time and materials.
What Should an Embroidery Density Chart Include?
- Recommended stitch density for different fabrics
- Best density for various fill types (satin, fill, etc.)
- Thread and needle compatibility
This chart helps you deliver consistently high-quality custom embroidery designs, whether it’s a custom pet embroidery job or embroidery custom hats for a sports team.
Let Patch Makers USA Help You Nail the Details
Stitch density might sound like a small technicality, but it’s the backbone of successful machine embroidery. From custom embroidery shirts to embroidery custom dash covers, it ensures every design not only looks good but also wears well.
From personalized custom embroidery hats to detailed custom embroidery digitizing services, Patch Makers USA brings you professional-level precision on every order.
With cutting-edge equipment, skilled digitizers, and an eye for design, we help your custom embroidery dreams come to life—down to the perfect stitch density.